
Racerback Maxi Dress FREE pattern and tutorial
Today I’m so excited to be a part of 30 Days of Sundresses series at Melly Sews! I participated last year, and this year I’m bringing you a free pattern and tutorial for a racerback maxi dress that is super comfy and early maternity friendly! But if you aren’t pregnant, don’t worry – baby bellies are not required. ;)
Knit dresses are easy to wear at this stage in pregnancy, because a maternity dress isn’t always necessary. I certainly won’t be able to wear this into my third trimester, but I’ll be able to wear it next summer when I’m not pregnant anymore!

The racerback is so fun for summer!

Notes on Size: This dress pattern comes in one size, and it is comparable to a ready-to-wear medium. The bust is between a 36-37in. But keep in mind that it’s a knit dress, so you may be able to fudge it a little with the right kind of fabric. I am 5’3 (and a half ;) and I made the dress an inch longer than is good for me, with a 1in. hem. So keep this in mind in case you are taller and want to lengthen your dress.
You will need to use knit fabric that has at least 30% stretch. This is super important. (If you’re a little smaller than a medium, though, you could probably get away with a knit with less stretch) I made one with about 10% stretch and it was a stretch (ha! pun intended!) to fit into it. This dress -without a baby belly- is intended to have a looser fit and not be skin tight, which is why you want more stretch.
Now let’s sew!
1.Download your FREE If Only Designs Racerback Maxi Dress pattern. Cut out your fabric. The pattern includes a 1/4in. seam allowance unless otherwise noted. *Make sure you download or export this pattern to your desktop so that you can print it from Adobe Reader*
2. Place your front and back pieces right sides together. Sew both the shoulders together.
3. Sew down one side of the dress from armpit to bottom with a zig-zag stitch or using a serger. Then sew down the other side, stopping at around 26in. from the armpit. (This is where you are going to create the side slit – I put mine on the left side of my dress, but you can choose whichever you prefer – or both sides!) I used a serger, so I serged off the edge of my dress.

4. Sew a straight stitch about three to four inches with a 3/8in. seam allowance.
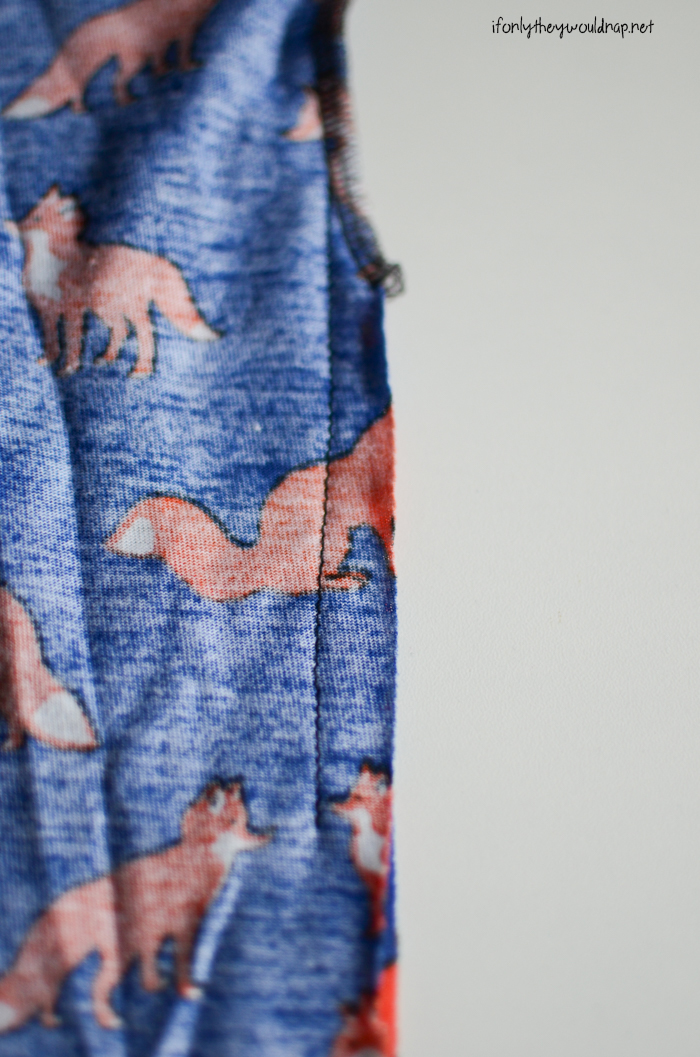
5. Serge or zig-zag the edges of the fabric from where you left off with your serging/zig-zag until slightly past your straight stitch. (If you choose not to do this, it will be fine, because knit does not fray. But it will look much nicer, especially with a serger) Press this open, all the way down to the hem.
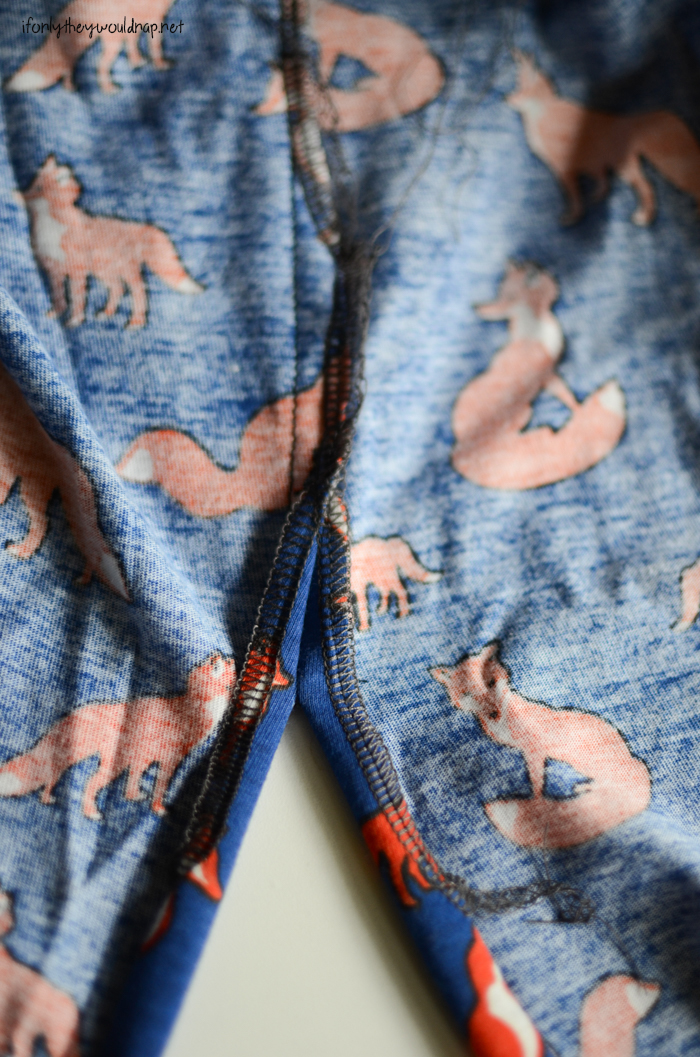
6. There are two ways you can finish this side slit. You can use a coverstitch (affiliate link – this is what I use and SO highly recommend!! :) Or you can use a double needle. If you don’t use a coverstitch, you may wish to serge the raw edge of the fabric all the way to the bottom.

7. Fold the bottom up to your desired length and hem with a coverstitch or double needle. I use a 1in hem.

8. Make your arm and neck bindings. Measure your neckline and armscyes – your bindings should be 85% of these lengths. The stretch of the fabric should go lengthwise. The width of these bindings can be between 1 and 1 1/4in. (I’ll explain which I prefer and why in step 11). Sew the short ends right sides together.
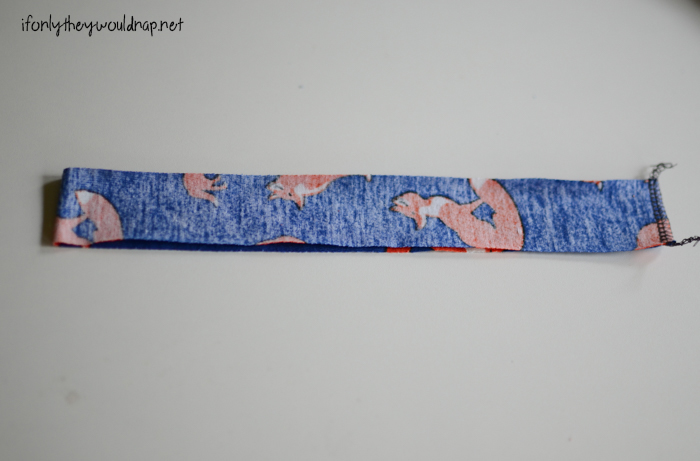
9. With right sides together, pin the binding to the armscye/neckline. You will slightly stretch the binding.

10. Serge or zig-zag the fabrics together.

11. If you are not using a coverstitch, I recommend cutting your binding 1 1/4in. wide. You will bring the binding to the wrong side of the dress, folding the raw edge under. Use a double needle to stitch it in place.

If you are using a coverstitch, I prefer to use a 1in. wide binding, because it’s not necessary to fold the raw edge under.

Now you have a lovely racerback maxi to wear all summer long!

I really think that I could wear knit maxis everyday, because it kind of feels like wearing your jammies all day in this dress! Quick note: I lowered the armscye slightly after taking these pictures.

This dress is super quick to sew, but watch out – it’s addicting! I already made another and have a third partially sewn. I also included a cut line for making your racerback a shirt instead of a dress. I’ll share a tank top version hopefully later this week!

Don’t forget to download your free If Only Designs Racerback Maxi Dress pattern, whether or not you’re sporting a baby belly. ;)

Happy sewing! Make sure you check out the other lovely sundresses as part of the 30 Days of Sundresses series!

JESS – this is AMAZING!!!! And boy do you look FANTASTIC!!! I am so excited and happy for you!!
Lovely dress sewn in bright colored floral pattern! Seems practical for summer, yet with a shawl or cardigan, ideal for Spring and fall also. Great outdoor photo shoot! Thanks for sharing!
Thank you so much for the pattern, it just happens to be my size…;o} You look so beautiful in your dress…Congratulations & God’s Blessings to you & your family.